Heavy Equipment Blog

Monthly Archives: November 2022

Diesel Exhaust Fluid

Diesel exhaust fluid (DEF) has quickly become a necessity on every jobsite. Formulated to reduce vehicle emissions, the fluid works by treating exhaust gases after they have left the engine. With the importance of DEF fluid projected to increase, follow these tips on proper use to get the most out of your equipment.

About DEF

Composition

Diesel Exhaust Fluid (DEF) is made from a mixture of purified water and urea. The formula is stable, colorless, non-toxic, and similar to baking soda in its alkalinity (pH). It is not a fuel, but it is used to reduce the level of nitrogen oxides in the exhaust to meet emissions control standards.

Purpose

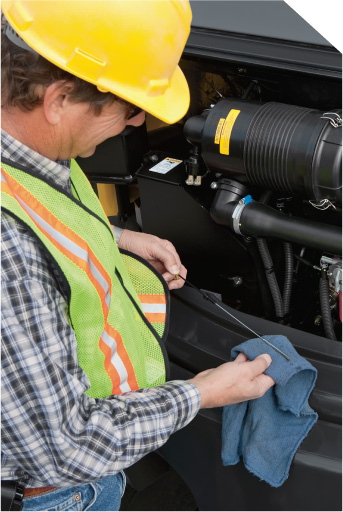
In the Selective Catalytic Reduction (SCR) system, DEF is injected into the exhaust. It converts the NO2 into nitrogen gas and water vapor, which are harmless components of air.

Storing

The ideal temperature range for storing DEF is between 32°F and 86°F, and its average shelf life is 3 years. Keep DEF out of direct sunlight, and do not store it in temperatures below 32°F. Because of its alkalinity, DEF fluid can cause oxidization in the same way that oxygen rusts raw steel, so it needs to be stored in plastic or stainless steel containers.

What to know when filling your DEF tank
  • DEF tanks are designed so that the opening will only accept a DEF fill nozzle. A standard nozzle for diesel fuel will not fit into the DEF tank opening. This safeguard ensures that only the proper fluid can be pumped into the tank.
  • DEF tanks will hold between 15 and 50 gallons, depending on the size and horsepower of your equipment. Be sure to keep enough reserves on hand, as equipment will cease to operate once the DEF tank is dry.
When to refill the tank
  • A DEF gauge has been added to most new equipment that will show the fluid level and indicate when it is time to refill.
  • When the DEF fluid level reaches less than 10% capacity, a series of warnings will alert the operator.
  • If the DEF tank contains less than 5% of its capacity, the equipment engine power will de-rate. Enough power will be available, however, to travel a short distance, so that you can add more fluid to the tank.
  • The DEF tank needs to be filled once for every 3 to 4 times that you refuel with diesel fuel. The frequency will vary with operating conditions.

Purchase Your DEF Today

Choosing the Right Excavator

Choosing the Right Excavator

The most important question to consider when choosing an excavator is what type of work you will be using it for. Excavators are a vital tool for many industries and projects, including general contracting, grading, pipe laying, mass excavation, demolition, and clearing jobs.

Matching the excavator to the job and the jobsite correctly can mean the difference between completing a project successfully or failing. There are many different combinations of features and capabilities that should be considered when deciding which excavator is best for your business, including size, attachment options, reach, bucket size, fuel efficiency, and more.

What Type of Jobs

The key to choosing the right excavator is understanding what types of jobs you will use it with. The machine required solely for excavation may not be the same excavator suitable for site preparation. Working on confined, urban jobsites also requires a specific set of features and capabilities.

When completing municipal jobs, you will often run into space restrictions and legal weight limits. In order to avoid damaging a jobsite or receiving fines, you need to be aware of your machine’s maximum operating weight, as well as the amount of tail swing.

It’s also important to match the size and weight of your excavator to the job. Completing a small scale trench excavation job with a heavy excavator that has versatile hydraulic attachment capabilities is only going to increase your fuel costs unnecessarily. On the other hand, attempting to take on a large scale demolition job with a mini excavator will prevent you from completing the work efficiently and safely.

Necessary Configuration

After determining the type of job, it’s important to ensure that the configuration of the excavator is suitable for your specific jobsite needs. For example, the most critical aspect of selecting a machine for excavation is determining your daily digging goals. Once you understand your digging targets, you can match the size and capacity of a bucket to the density of the heaviest material you expect to handle.

You also need to make sure you choose an excavator that can properly accommodate the bucket required to excavate that load. The power of your excavator’s engine, along with its hydraulic system, ultimately plays a large role in the types of attachments the machine can power, its breakout force, its ability to maneuver on difficult terrain, and the type of loads it can handle.

Technology

New technology is making excavators smarter and more advanced. Machine communication, telematics, and fleet management software all allow owners to understand more about their equipment. That information helps them to manage maintenance scheduling efficiently, monitor operational data better, and provide recommendations to operators to improve machine productivity.

There have also been innovations in group efficiencies and fuel economy in the form of variable speed control technologies and multiple engine modes. Understanding these new technologies and how they can improve operation will help you make knowledgeable decisions about which ones to include on your excavators and which ones to pass up.

Attachment Capabilities

Another key aspect to consider when choosing the right excavator is what type of attachments it is compatible with and how easily you can swap out attachments. Some of the most popular excavator attachments include buckets, grapples, shears, hammers, and pulverizers. Each of these attachments should be matched to the abilities of the excavator being used.

Different excavators have different hydraulic and coupling capabilities, which means some may not work well with certain attachments or with constantly switching attachments. For example, it is estimated that a quality automated coupler on an excavator can save owners up to 25 percent of their total machine operating time compared to direct mount attachments. Couplers make it handy to change attachments, such as swapping a regular ditching bucket for a grading style bucket for grading applications, or changing buckets to match trench width requirements. Ensuring your excavator has the correct type of coupler for your needs is very important to overall efficiency.

There are many available options when choosing an excavator for your business. The most important thing to do is make sure the machine has the capabilities you need and can handle all the work you need to accomplish with it.

Contact us today!

Extend Engine Life with these Clean Fuel Tips

The last thing your fuel system needs is contaminants. When dirt and dust build up in the system, they can actually reduce engine life by up to 50%. Contaminants are the leading cause of fuel system problems, being the culprit for over 85% of system failures. In other words, it’s vital that you keep your machine’s fuel and fuel system clean or it can potentially lead to very large, costly problems down the road.

Where damage can occur

Dirt and dust can accelerate component wear and damage wherever quick sliding movements are important. Although small, these contaminant particles can create more friction and interfere with proper movement in the engine. Parts like inner and outer valves, nozzle needles and seats, command piston sliding portions, and the injector barrel and plunger on the control valves are especially vulnerable to damage caused by dirt and dust.

How dirt and dust can enter the fuel system

Dirt, dust, and other contaminants can enter your machine’s fuel system in several ways. Dirt is often introduced through dirty tank spouts, dispensing funnels, or when you remove a dirty fuel cap. However, contamination can occur long before you go to fill up your tank. Gasoline and diesel fuel travel a long way before they enter your machine’s tank. During this journey of transportation, transferring, and storage, there is ample opportunity for dirt to get mixed up with the fuel.

How to prevent dirt and dust from entering the fuel system

Although it is possible for contaminants to enter fuel before it gets to you, there are still some best practices you can follow to prevent dirt and dust from entering on your end. First off, it’s important to properly maintain all your fueling equipment. When you refuel your equipment always be sure to replace the nozzle on the pump, never let it dangle where it will pick up dirt and dust.

Next, if you are operating in a dirty and dusty environment (like most construction machines), you can help prevent dust from entering the system by making sure the vent tube and fuel tank caps are tightly sealed. Dirt and dust can also enter your engine while it’s being serviced. To avoid this, try to always change filters, refuel, or make any type of engine repair indoors, if possible.

The last thing you can do is always change filters at the manufacturer’s recommended interval. If you leave filters on too long, they will become clogged and will not be able to effectively prevent dirt from circulating through your engine. Carefully follow the instructions provided in your equipment operator’s manual when changing both the main filters and the prefuel filters, so that dust does not enter the fuel system during this process. Always check seals to detect possible leaks.

Stop water from entering the system

Dirt and dust aren’t your only enemies when it comes to your fuel system. The other thing that you want to keep out of your fuel at all costs is water. Water can enter your fuel by various routes, but the most common is condensation. In less than full tanks, warm, moist air condenses on the cooler, inside wall of the tank. Before long, droplets of water mix with the fuel, causing the deterioration of the gasoline or diesel and hurting machine performance.

To avoid this, you should fill up the fuel tank at the end of each day. Also, before beginning to operate your equipment the next day, drain the water and sediment that has accumulated at the bottom of the tank. Similarly, about ten minutes after refueling, water and sediment should be drained from the fuel tank.

Contact Your Local Branch for More Information

Radiator Care

Never open or inspect the radiator while the engine is running or the system is hot

Personal injury can result from hot, pressurized coolant. Always shut off the engine and allow the radiator to cool before examining the system or beginning any work.

Keep coolant fresh

It’s estimated that 40%-60% of engine failures are coolant related. These failures either are related to using an improper coolant or to topping off the system with the wrong product. Keep careful records to make sure you’re changing the fluid at factory recommended intervals and not mixing coolants.

Remove blockages daily

Check your radiator screen daily during warm weather for dirt, grass or other debris. A clear screen will help your machine stay cool and assure maximized performance.

Clean radiator cores

Use compressed air to blow debris from the cores. If material remains, you can use high pressure water or steam to remove dust and debris, but compressed air is preferred.

Inspect the radiator cap for damage

When the radiator is cool, slowly remove the radiator cap to reduce system pressure. Inspect the cap for damage or deposits of material. If any cracks or damage are visible, install a new cap. Otherwise, clean and close the cap firmly.

Be especially vigilant when using hydraulic attachments

Hydraulic attachments put more stress on a machine’s cooling system than using a bucket. This stress leads to faster overheating and requires the operator to keep a close watch of the machine, especially in hot weather.

Schedule an Inspection Today!

Cutting Edges

Operating Tips
Avoid back dragging

Back dragging reduces cutting edge life by causing it to break before it wears down.

Minimize excessive down pressure

Buckets last longer if the operator minimizes the amount of pressure applied when the bucket is engaged with the ground.

Avoid using blades in wet conditions

Blades wear faster in wet conditions.

Equipment Tips
Use corner attachments

Corner guards increase the bucket’s strength. Not using corner guards can cause premature wear.

Use a thicker edge

More powerful machines can use thicker edges, and, in most cases, they should.

For grader blades, consider using single bevel curved blades instead of double bevel curved

The leading bevel on double bevel curved blades wears out quickly, turning it into a single bevel curved blade. Single bevel curved blades last longer and are more cost effective.

Use proper bolts and nuts

Loose bolts and nuts cause the cutting edge to be loose on the moldboard, which can lead to breakage. Use Grade 8 bolts or higher; lower quality may stretch and loosen.

Rotate the cutting edge consistently

Flipping the blade regularly can double the blade life. The flipping interval depends upon what type of material it’s used for, and the application.

Protect snowplow cutting edges with a standard flat blade

The steel in carbide snow plow blades can corrode, causing the carbide inserts to fall out.

Inspection Tips
Inspect loader edge position

The base edge is the primary support for the bucket system, while the primary engagement edge should be the bolt-on cutting edge. If the base edge is worn out, the bucket is not as stable.

Inspect loader wear plates and replace when needed

Increase the life of the bucket and cutting edge by replacing wear plates regularly.

Routinely inspect and secure bolts

Loose cutting edges can easily be damaged and may fall off and damage surrounding equipment.

Contact your local branch for more information

Coolant Tips

Coolant is important in your equipment’s cooling systems to prevent freezing, corrosion, cavitation and rust. A periodic coolant analysis can provide important information about the health of your machine.

What’s in coolant?

Nearly all heavy-duty antifreeze is about 95% ethylene glycol and 5% water and additives. About 1% of all antifreeze sold is made from propylene glycol, an alternative to ethylene glycol which is less toxic, but more expensive. By mixing glycol with various ratios of water, coolant is created. Typically, coolant is 30 – 50% glycol.

Formulations differ with the additive package that’s blended into the ethylene glycol. All of these additives fight rust, scale and corrosion but may have different chemical compositions. In diesel engines the additives also protect wet cylinder sleeves from cavitation.

What to look for when buying coolant
  • Make sure the coolant you purchase for your diesel engines states that it complies with ASTM standard D-6210 on the package.
  • Deionized water is preferred and the coolant should be prediluted, so there is no need to add water.
  • Pick an antifreeze type, avoid mixing it with other types, and follow the maintenance recommendations suggested for that coolant.
Maintenance Recommendations
  • Periodic visual test
    The color should be clear or match its original color when you purchased the coolant. Changes in the color may indicate rust is present or that it has mixed with another antifreeze type.
  • Test additive concentrations with a coolant analysis test by taking a sample and submitting it to a third party lab.
    The recommended interval for testing is 1,000 hours.
  • Sample strips are available to test additive concentrations yourself.
    Using paper chemically sensitive test strips, you can see problems from color changes which indicate freeze/boil point (glycol content) nitrite (or nitrite/molybdate) levels and, in some instances, pH.

Order Your Coolant Now

Lubricants & Oils

Choosing the right lubricants for your machines is critical to maximizing component life and minimizing downtime. For optimal machine operation, adhere to specifications in the owner’s manual. We have put together lubricant tips to enhance your equipment’s operation

Hydraulic Oil / Fluid

Why is it important?

Hydraulic oil’s primary purpose is to transfer power, but the fluid is also important to protect hydraulic components by lubricating the parts it comes into contact with.

Best Practices
Keep it zinc free

Zinc is commonly added to hydraulic oils to reduce the wear of components, such as pumps, motors and valves. However, zinc itself is a heavy metal that can cause wear and erosion, and is also unfriendly to the environment. Zinc free oils, such as Panolin Hydraulic Oil, include synthetic additives to provide the same wear reducing benefits of zinc, without the risk of corrosion or harm to the environement.

Choose hydraulic oils with water emulsifiers

When water separates from oil, it can cause serious damage in heavy machinery. Emulsifiers disperse water, reducing the risk of water damage. Choose hydraulic oil with emulsifiers, such as Panolin Hydraulic Oil, and avoid oils that promise to shed, separate or release water.

Filter first

Make sure you filter any hydraulic fluid you add to your machine, even if it is brand new. By filtering before you add it, you can avoid contamination, which can lead to component wear and system failure.

Transmission Oil

Why is it important?

Transmission oil enhances clutch performance, protects gears and bearings from wear, and keeps components cool when in operation.

Best Practices
Use the right oil

Consult your owner’s manual for the correct type of transmission oil. The most important consideration is weather. If you are going to use your equipment in a variety of conditions, make sure you choose a multi-season transmission oil. By choosing a multigrade oil, such as Panolin’s EP GEAR, you can avoid unnecessary oil changes as the seasons change.

Change oil correctly

Oil change intervals vary with use, but when you do change your transmission oil, make sure you take a number of precautions to avoid contamination: wash the transmission tank before removing cap, drain the oil as quickly as possible, install filters carefully, and keep filter packages sealed until they are ready for use.

Change your filters periodically

By properly following the guidelines set out in your owner’s manual, you can avoid damage and wear caused by contamination.

Grease

Why is it important?

Choosing the right grease for your machine is extremely important to maintain optimal performance. Grease reduces friction and wear caused by daily operation.

Best Practices
Meet or exceed the owner’s manual requirements

The owner’s manual outlines the grease specifications to meet minimum operating requirements. Choose grease that exceeds these minimum requirements to increase parts life and performance.

Purge when adding any new grease

When grease is changed in any part of the machine from one type to another, purge the old grease. The old and new grease may not be compatible, which could cause serious problems for your machine.

Contact your local branch with any questions about choosing lubricants for your equipment

Service Tips

Avoid Machine Downtime

5 Tips for Keeping that Big Iron Working
  • Check Fluid Levels Daily – Inspect the levels of hydraulic fluid, coolant, and oils before operating your equipment
  • Ensure Radiators are Clean – Check your radiator screen for dirt, grass, or other debris and remove any blockages with compressed air
  • Turn Off Master Switch – Turn the engine off at the end of the day to avoid idling and reduce fuel usage
  • Never Run the Fuel Tank Dry – Operating your equipment on an empty tank can cause damage to components and emissions systems
  • Invest in Telematics – Reduce the cost of ownership with detailed reports on equipment use including location, idling time, and machine downtime

Call Today!

Hot Weather Tips

How to Maintain Engine Cooling Systems

The cooling system in your equipment is necessary to keep it from overheating, which will lead to serious damage and costly downtime. In order to properly cool your machine and keep the engine operating as efficiently as possible, you have to take several steps to maintain the cooling system and ensure it’s working at its best.

Regularly check cooling fans

Cooling fans help remove excess heat from the engine. Cracked, scratched, or otherwise damaged blades will cause the fan to not be balanced correctly, leading to vibrations that can cause harm to internal components. Additionally, do not let debris build up around the fan, as this can cause it to blow a fuse. To avoid costly repairs and unnecessary downtime, always inspect cooling fan blades for cracks, nicks, debris build up, or any other visible signs of damage at regular intervals.

Hose to neck seals can wear out at a fast rate because hoses and clamps expand and contract as the temperature in your equipment’s cooling system rises and falls. Worn seals will eventually fail, potentially leading to costly damage and repairs, which means it’s critical to inspect all hoses and lines for cracks, leaks, or excessive softness or hardness. As a general rule of thumb, hoses should be removed and replaced every two years, or at the interval recommended by your manufacturer.

Perform routine coolant analysis

Regular fluid analysis will help you identify problems before they become major issues. Half of all water pump failures are caused by a concentration of antifreeze that is too high for the cooling system and could have been avoided with coolant analysis. The best way to prevent this type of failure is to send a sample of your coolant to a professional lab for analysis.

Keep the radiator clean

Dirt, dust, and other debris can build up on your machine’s radiator, reducing airflow, impeding heat transfer, and causing higher operating temperatures. This increase in temperature can cause your engine to overheat and shut down. Power washing the radiator and cooler should be done every few days, especially during hot weather, to prevent downtime and damage.

Contact Great Southern Equipment for More Information

Attachment Maintenance

Keep Costs Down by Extending the Life of Your Attachments

Hydraulic Hammers
Complete a Regular Three Part Inspection
  1. Check for leaks in the attachment’s fittings or hoses. Prior to use, inspect hoses for cracks and check that shielding is in place. Make sure your fittings are not loose and your hoses and fittings are free of contaminants.
  2. Inspect critical points for proper lubrication and function. Power wash the attachment to remove dirt, sand or other contaminants. Once clean, follow the manufacturer’s guidelines for proper special grease or oil lubricant requirements for proper bushing wear. These contain special agents designed specifically for manufacturers’ units, and standard grease is not acceptable for most hammers.
  3. Make sure the locking mechanism is operating correctly. The locking mechanism should not be stiff or bent to ensure proper locking and unlocking of the attachment. Check for damage whenever attachments are changed. Never pry with a tool while operating.
Best Practices
  • Keep hydraulic hose ends out of the dirt
  • Make sure your hammer’s in and out ports are closed on the jobsite as dust and sand can easily enter if left open
  • On a weekly basis, or every 10 hours, remove and inspect the retaining pin and tool
  • On a monthly basis, or every 50 hours, inspect the tool shank and bushings, carefully checking for wear
  • Every 50 hours, inspect hydraulic hoses
  • Hammers should be serviced annually or every 600 hours
Buckets & Teeth
Bucket Inspections

A well maintained bucket can cut down on costs by digging and breaking out more efficiently, which reduces fuel consumption and increases the rate of job completion. Prior to use, carefully check the following parts of your bucket:

  • Mounting Hinges
    Inspect for cracks. A small crack can quickly become much larger, so if you see any cracks, get them fixed immediately.
  • Front Leading Edges and Corners
    Visually check to see if they are getting thinner or if there are signs of cracking. If so, the corners can be re-plated and thickened to increase the life of the bucket. If left unchecked, the corner could fail during heavy digging and the bucket edge can be torn out completely and would have to be replaced.
  • Bucket Edges
    Any signs of distress? If so, can it still be serviced? If you are working with a bucket with reversible edges, you may want to consider rotating them.
  • Bucket Teeth
    Check if they are worn or need rotating. Teeth that are regularly rotated last longer, saving you money. Because corner teeth tend to wear faster, move them to the center to increase their life. The lower edges of teeth wear faster, so you should rotate them to ensure more even wear.
  • Lost Teeth?
    Do not use a bucket with a missing tooth. Not using a full set of teeth will wear away the adapter nose and result in poor contact when new teeth are installed.
  • Correct Bucket Teeth?
    There are a wide range of bucket teeth that can be used for a variety of applications. Make sure you have the correct teeth for the job, such as penetration teeth for rock or abrasive teeth for coal.
  • Lubrication
    Is the bucket properly greased? Insert some lubrication into the proper bucket pin locations. Simple lubrication is the cheapest and best form of maintenance.
  • Check pins and bushings for wear at this time
    Worn pins & bushings cause more stress on the machine and rapidly lead to expensive and more in depth repairs when let go too long. Also, worn pins & bushings result in less control of the machine during operation.

Contact Your Local Branch for More Information